Menu buttons


Showing posts with label 31 Days of Creative Celebrations. Show all posts

Tuesday, December 6, 2011

31 Days: Day 31 - Recap

I thought I'd wrap up the series by doing a quick recap of all the posts from the 31 Days of Creative Celebrations. The organizational side of my brain demanded it - you know, to make referecing everything easier... :) Enjoy!

Intro

Day1: Inspiration

Day 2: Invitations

Day 3: Guest List

Day 4: Party Favors

Day 5: Gifts for Kids

Day 6: Super Sizing It (DIY projector tutorial)

Day 7: Gifts for Women

Day 8: Happy Birthday to...Me

Day 9: Gifts for Men

Day 10: Party Planning

Day 11: Decorations and Food

Day 12: Orchestrating the Fun

Day 13: Party Checklist

Day 15: Fish Birthday Party

Day 16: Other Gift Ideas

Day 17: Live and Learn

Day 18: It's All About the Presentation

Day 19: Halloween Decor

Day 20: Inspriation Board #2

Day 21: Finding the Fun in Daily Life

Day 22: Halloween Costumes

Day 23: Pirate Party Invitations

Day 24: How to Make a Pinata

Day 25: Traditions

Day 26: Thanksgiving

Day 27: Party Themes

Day 28: Homecoming

Day 29: Pirate Party

Day 30: Cards and Tags

31 Days: Day 30 - Cards and Tags

We've talked about parties. We've talked about gift ideas and creative gift wrapping. I guess that only leaves cards and tags.

Tags are pretty much a must when it comes to gift giving - at least if you want the person to know who it came from or where it's going to! But a lot of the time the card itself is an after thought. You've spent all this time deciding on the right gift then shopping for it or making it yourself and wrapping it up all pretty and all you want is to be done with it, right? Well, that's what happens to me when I hit that point. But I hate to just throw something on there and ruin the look.

When it comes to Christmas I try to think about the tags ahead of time, print them out all at once, then have them ready when I'm wrapping up the gifts. This year I went for a monogram look on the tags. Simple, easy and classic.


For all the other gift-giving events life throws at me, I try to keep a good supply of cards on hand. Most of my stash lives in this little guy - my card organizer box. I created a bunch of these a few years back as gifts, along with one for myself (see original post here) and it has worked pretty well for me.

Inside are tabs so I can keep the cards organized by category.


Here's a look at a few of the cards in the box.


And for those little things that don't really require a full out card, just a place to write To and From I use little tags or small 2x2 cards like these. They're also a great way to use up all those scraps!

Keeping the box fully stocked was pretty easy back when I lived in Utah and participated in a monthly card making group. I'm overdue for a big card and tag making session. Hopefully I'll get around to it after all of this holiday craziness passes us by.

Monday, December 5, 2011

31 Days: Day 29 - Pirate Birthday Party

Ahoy Mateys! Party day finally arrived for Cap'n Tyler! He was so excited and we had such fun! (and plenty of guests showed up yay - I have to admit I was still worried despite a few more RSVPs than last time)

Let me walk you through Tyler's Jake and the Neverland Pirates Birthday Party.

I blogged about the invitations earlier (link) so I'll skip right to the

Food:
First and foremost for every birthday party is the themed cake! I was happy to find a fairly easy recipe for making a pirate ship cake (link)
Tyler informed me that the ship's name is Bucky. And that Bucky MUST have 2 blue and white striped sails. And that Jake MUST be on the ship. Lucky for me I found a nice little printable playset (link) and just printed the characters onto cardstock and stuck them in the frosting. The party was scheduled from 10 - 11:30 so that I wouldn't need to serve a full lunch. But to round it out a little we had Cannon Balls (grapes), Treasure Maps (fruit roll ups), and Pirate (root) Beer.
And this little guy is the cupcake(s) I took in to Tyler's class today
Decorations:
I loved the idea of making a sail to add some height to the food table. It was pretty easy to tie a couple dowels together, stick them in a bucket of sand, and add a fabric remnant for the sail.
I liked the look of the pennant banner on top of the sail. I used the red/white striped part of the printables found here (link) (and also used that same site for the sailes on the cupcakes)for some of the pennants and cut a strip off one of the black plastic tablecloths for the other pennants and just added the letters (that I printed onto cardstock and cut out in circles - the same set of letters I used for the banner for the Fish Party) I went themey with the with the plates and napkins and just grabbed the pirate ones they had at Target. They worked well with the black, red and white color scheme I was going for.

The table was covered with the a black plastic tablecloth and an old looking net I picked up at the dollar store around Halloween. Add in some gold coins and a few other pirate accessories and I think it turned out to be a pretty cute table. Also note that little treasure chest. It too was a printable from Disney.com and we used it as our "Team Treasure Chest" throughout the party. (You'll see what I mean when I get to the activity part of the party).
A quick look at the outside. I didn't want to do too much out there but I do think it's important to put out some balloons to mark the party house, especially when some of the guests have never been to the house before.
And a sign on the door to set the mood.
Favors:
As I may have mentioned before, it was really hard to guage how many people were actually going to show up at the party. And in order to hopefully increase our chances of a good turn out we invited pretty much everyone in the neighborhood under the age of 12, and Tyler's entire preschool class. If everyone had come, we would have had 30 or so kids running around the place. Eek. We ended up with closer to 10, which was a great number. But I didn't know that during the prep work so I tried to plan accordingly. Instead of putting together favor bags, I just gathered a bunch of pirate theme prizes (stickers, candy, chocolate coins, real coins, plastic jewelry, etc) and used them in the games and the pinata. And for everyone to collect their "loot" I threw together my version of the bag "Izzy" on Jake and the Neverland Pirates wears around her neck to carry her Pixie Dust.

I printed out a bunch of blank tags, with a place for me to write the child's name on later. Then cut them into strips and stapled them to the strap of the bags.

The bags themselves were made out of felt, cut into a circle with a piece of embroidery floss (I tried the jute I had used everywhere else in the party but it was too thick and the bags didn't close well) around the outer edge to cinch it closed.

The Activities!

According to my usual MO, we started the party coloring pictures so that the kids would have something easy to do while waiting for everyone to arrive.

Then it was time for our Treasure Hunt! I had taken a piece of brown craft paper and drawn a map/blueprint onto it. Then I tore the map into pieces that I hid at each station, along with a few gold coins.
The first piece of the map led the kids upstairs to the playroom where they found the Walk the Plank game.

Basically it was a balance beam made from a 2x4 and a couple scrap pieces of wood. The kids walked across it to the far end, picked up a gold coin, then walked back across the plank and deposited the coin in the Team Treasure Chest.


Once everyone had a turn I helped them find the next piece of the map.

Which led us back downstairs to the living room and the Pirate version of the Open the Present game (does anyone know if it has a real name? I've never heard it called anything which makes it very hard to define). You've played that game right? Usually it's done at Christmas parties with large groups of people. You all sit in a circle and take turns rolling a set of dice. When a person gets doubles it is his turn to start opening the gift (which has been wrapped in many many layers of paper).

The catch is that first he has to get dressed up before he can start in on the gift. At the Christmas parties you usually have to put on a hat and scarf and a set of gloves (making it hard to get the gift open). For our Pirate version we used an eye patch, a pirate hat, and a hook in one hand.
The person that rolled doubles hurries to unwrap the gift before someone else rolls doubles and takes over the unwrapping (after first having to take the dress up clothes from the other person and put them on themselves). The kids really had fun with it.
The prize at the end of the gift was of course another piece of the map and a few more chocolate coins.

The next piece of the map took us to another section of the living room for the Coin Toss. Self-explanatory right?
Another piece of the map, another journey - this time to the sun room where the food was set up. Yay! Time for Cake!But we hadn't found the treasure yet! The next piece of the map led us to the garage for a scavenger hunt through the sand. Each person needed collect 2 silver coins, 1 copper coin, one precious gem and a pirate flag. At the bottom of the bucket, the final piece of the map was hiding.I had hidden the pinata inside a plastic tote and put a red X on the lid of the tote and the kids had to find the X. This wasn't as easy as it sounds, as our garage has its share of plastic totes, but it wasn't hard either.I made the pinata. You can find my tutorial here. (link)
Luckily the pinata held up long enough to give everyone a turn (thanks to forcing the big boys to wait until last). After that we went back inside to open gifts.

I think the kids had a great time. I certainly did while planning it!
Oh and in case you were wondering - the budget came in under $50, including food. yay!


Linking to:

Tuesday, November 29, 2011

31 Days: Day 28 - Homecoming


It has been interesting living in a mostly-military neighborhood. There is usually one friend/neighbor that is deployed or anticipating deployment or going off for training of some sort. It makes for an unusual dynamic as well as some unique experiences. We've had more than a couple "girl power" moments helping to change tires or repair fences when the husbands weren't around - oh how fun that was (ha). And though we've had our share of deployments, I've been thankful that there haven't been any recently, nor are there any on the horizon for my husband.

This weekend I got to experience deployments/homecomings from a slightly different angle. The husband of a friend of mine has been gone for the last seven months and he returned Sunday. It's been a rough one for her, as she found out she was pregnant just a few days after he left and the pregnancy itself hasn't exactly been an easy one. Of course she's been incredibly excited and nervous about the homecoming and shortly before leaving to pick him up she asked if I would tag along and take photos (and the added moral support probably didn't hurt either).

It was a fairly smooth homecoming, as far as those things go. They had the place for the families to gather all prepared and were handing out little flags and things for the kids to color while they waited. The plane itself was only 30 minutes late. And talk about your celebration plans - there was a marching band, some sort of honor guard of bikers holding a line of flags, and they literally rolled out a red carpet on the tarmac. Then there were the families, who I'm sure had spent the day cleaning their houses and planning big dinners, with homemade signs and balloons in hand, all shined and polished and dressed up (oh some of those outfits were absolutely darling. A little girl in a camouflage tutu, a toddler in a mini set of fatigues). All of this for just that one moment of seeing their loved one for the first time - a guy who cares about none of it except for the big hugs and kisses.

I stood back and watched it all - for once not being the one experiencing all of those crazy emotions. Seeing it from the outside while understanding it from the inside. It made me think about things a little - that endless time spent waiting, all those hopes and plans and dreams and preparation leading up to that moment...totally worth it.

Thursday, November 24, 2011

31 Days: Day 27 - Party Themes

Does anyone else take the time to look through past blog posts and enjoy all the little trips down memory lane? Today I took a little time to re-explore all of my little craft get togethers, baby showers, birthdays, and the BBQs with The Girls
Like this pinwheel BBQ one - I had completely forgotten about it!

So I thought I would do a quick round-up of past party posts from the blog. You can see the complete list of party posts here. (or just use the keyward party on the labels list on the sidebar)

Topping the list for my most Over the Top or labor intensive birthday parties is either:

Kaitlyn's Sleeping Beauty Birthday party where I created an entire castle out of cardboard boxes
or
Kaitlyn's Dora the Explorer birthday party where I turned the whole thing into one giant episode of the TV show.
And the most popular party on my blog - Tyler's Dump Truck Birthday Party. According to the blog stats that post gets the most hits monthly and of all time, by a huge margin. (I thought that was interesting, don't you?)


Ok back to Turkey Day. I hope you are all happily in a turkey coma by now! :)

31 Days: Day 26 - Thanksgiving

(photo credit)

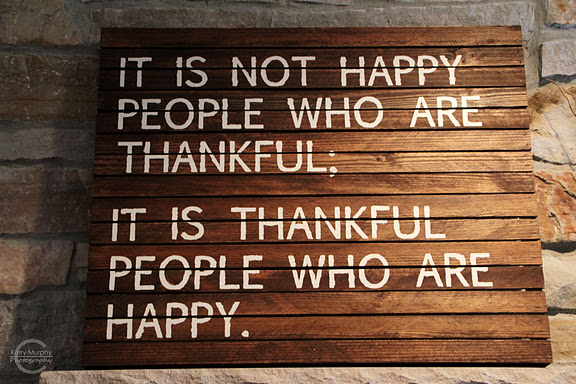
I have a "thing" for the word happy. Or joy. If I see a quote using one of those words, it almost always calls to me. One of my other favs is "just for today, be happy."

I believe that a lot of our moods are based on our perspective and outlook on life, not on what happens to us. I also believe that it is our "job" to find and create happiness for ourselves and other people in our lives. We can decide to have a good day. We can recognize when we are cranky and do something to lift our moods (chocolate always works! haha or music). We can enjoy whatever small moments life hands us and not go looking or wishing for something better. Because whatever we have right here, right now is enough, in fact, I bet it's pretty great.

We are celebrating Thanksgiving here at home today, just our little family of 4. We had the option of traveling back to Utah for Thanksgiving with our extended families but we chose not to. And we're still relatively new in town so the neighbors and coworkers we felt close enough to to invite to join us for Thanksgiving already had plans. That's ok. Because the people that are here in this house right now (currently all sitting on the couch watching cartoons) are all it takes for me to feel loved and happy. I know the rest of our loved ones miss us and may even spare us a thought or a phone call today but I want them to enjoy their Thanksgiving without us as well.

Parties and celebrations come in all shapes and sizes, right? It's all about putting forth just a tiny bit of extra effort to make a day, or a moment, just a little more special than the norm. So today we are doing our own version of Thanksgiving dinner - a turkey that Sam will spend the day smoking (with menu plans for at least 2 other meals that incorporate leftovers!), cranberry sauce, mashed potatoes and gravy (Kaitlyn's favorite), rolls, dressing, and corn (another request from Kate) and two pies (pumpkin and chocolate, already waiting for us in the fridge). The green bean casserole, jello salad, mac and cheese and other things that may usually grace the table didn't make it into our top 5 and we're ok without them. (in fact, other than the jello salad, the kids are probably glad about that) And instead of spending the day sitting around the kitchen visiting while the kids are off playing, maybe we'll have them help more with the meal preparation. Or sit down and make a family list of things we are thankful for. And probably print off one or two of the great printables I've seen online (like this printable placemat or
this Roll a Turkey game). But whatever it is, I will be happy to be spending the day with my adorable kiddos and great husband, and very thankful for all the wonderful people and things that make up my life.

Happy Thanksgiving everyone!


Tuesday, November 22, 2011

31 Days: Day 25 - Traditions

What is the first thing you think about when it comes to celebrating the holidays? My guess is that most of you would list something that involves some of your family traditions, right? Gift giving, decorating, parties...they all include some sort of tradition. For example, I always wait until the day after Thanksgiving to get out the Christmas decorations and put up the tree and I almost never fail to do that on that day. Tradition. My husband makes gingerbread waffles on Christmas morning. Tradition. Taking one night to drive around the neighborhood to see the lights while drinking hot chocolate and listening to Christmas music (Trans-Siberian Orchestra). Tradition. It's what makes the holidays special and fun.

Traditions aren't just for the holidays. I'm sure a lot of you have ways you like to celebrate birthdays or good grades on a report card or a promotion or National Cheesecake Day. ;) The kind of things that make the difference between and ordinary day and one that's just a little bit more. Please share!

One of my favorite traditions for the upcoming holidays is the month-long visit from Santa's Elves. This is an idea I started 4 years ago (original post here) and the kids have been in love with it ever since. In fact it's very highly anticipated and Kaitlyn has already been talking about them this year.
For those of you that aren't familiar with what I'm talking about, our Christmas elves are a variation of the Elf on the Shelf. Santa sends his elves to our home to report back on the kids' behavior. During the day the elves are just stuffed toys, but of course they're magic and at night they like to play. We often wake up to find they have been up to some silly stuff while we were sleeping. Sometimes they bring things for the kids. Sometimes they leave notes. Sometimes they get in a little bit of trouble. (really it just depends on how creative I am and how well I planned ahead!) It's all a lot of fun.


Since I started the tradition, I've had more than one of my friends join me in it. And this year I've been happy to see even more ideas and fun things online that go along with it. (Check out my Christmas board on pinterest. I have a few unique ideas pinned on there) There is a fun website devoted entirely to Elf on a Shelf (link here) and they are even coming out with an Elf on the Shelf movie! (set your DVRs! this site says the TV special will be on CBS November 25th then on DVD after that) So fun!

Now, it's time for me to get a couple orders ready to go in the mail before heading up to the school to watch my daughter race in the elementary school's traditional pre-Thanksgiving Turkey Trot. I'm interested to know though - what are some of your favorite traditions (holiday or otherwise)? Do Santa's elves visit your house, and what do they do while they visit?


Monday, November 21, 2011

31 Days: Day 24 - How to Make a Pinata

My son's only real request for his birthday party was a pinata. Swinging a stick at something until you bash it open to reveal fun prizes? Yeah, that sounds perfect for a 4-5 year old boy, right? Specifically, he wanted the Transformers one he spotted at Walmart. But since he party theme is Jake and the Neverland Pirates, I thought a treasure chest might be more appropriate. And since I have a hard time wanting to pay $15-20 for an empty pinata at the store, (and because it's me and I'm known for doing things the cheaper, more labor intensive way!) of course I made one myself! And since I was going to all that work anyway, I figured I'd take photos along the way and share a quick tutorial with all of you.
Here is my inspiration photo.


(photo credit)
I started out with a couple sheets of posterboard. Cardboard or foam core would work too. Whatever you have.
For the sides of the chest I cut a rectangle approx 10" wide and 8" tall, then cut off the corners to make the top wider than the bottom.


I also made 2 half circles, the diameter of each the same width as the top of the side pieces (8")Once I had the sides for quidelines, I measured the angled pieces and cut a series of rectangles for the rest of the pieces. I decided I wanted the chest 15" wide, so that is how wide all the rest of the pieces will be and the other measurement corresponds to where it fits on the chest. The width of the bottom piece matches the bottom of the side piece (approx 7"), the front and back match up with the sides on the side piece (approx 8 1/2"). I cut the top piece slightly larger than the round part of the half circles, again, at 15" wide.


I added an extra piece of posterboard (using spray adhesive) to the top piece in the center, then punched holes through both and ran a piece of yarn through it for hanging.


Now it's time to assemble! Using small tape pieces I took one side and just started adding pieces. Once the pieces were in place I went back in with larger pieces of tape and fully covered every edge with tape.Assembling the top as one piece and the bottom as another piece, then joining them together from the inside at the back and sides. I left the front open so I could stuff the pinata later.


On to the decorative part! I simply took a roll of crete paper and using spray adhesive, applied it in overlapping strips (you could also fringe the edges, but that's a whole lot more work). Once the entire thing is covered you can go back and trim the edges and put on one more strip of crepe paper to make it all clean and pretty.
Time to add the prizes!On any other pinata I would have left a small tab opening on the side to stuff the items into. As the design on this one worked better to just leave the front open and it's hard to get tape inside to adhere it as we did the other sides I fudged it a little by punching a few holes and kind of lacing the front together with yarn. You hardly notice it and could cover it up with decorative items later if it bugs you.
It was a pretty simple matter to add the lock and the trademark sword on the sides. I just free-handed something that kinda, sorta, resembled them onto some golden yellow cardstock and cut them out.And there we have it! A fully assembled treasure chest pinata in under an hour and probably less than $2 in materials (not counting prizes). Yay! Next on the list - party favors or games...