Menu buttons


Tuesday, June 22, 2010

Red, White, and Blue

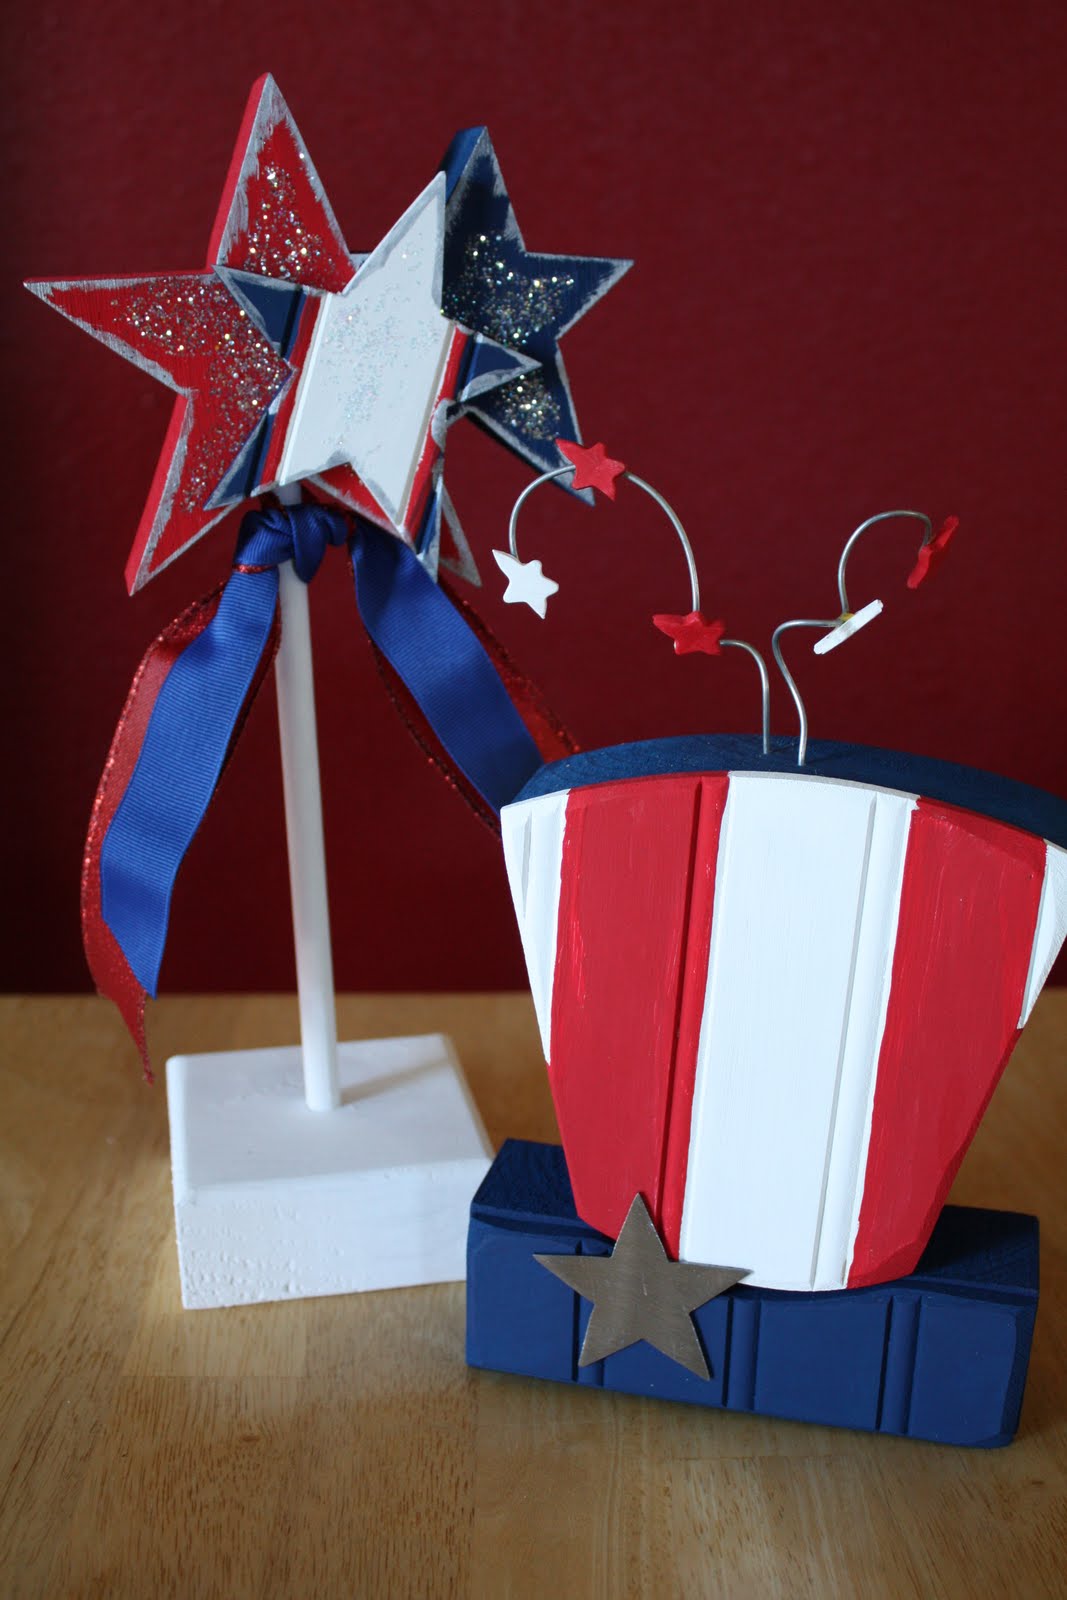
Just wanted to share. I had a project day on Saturday and am so happy to finally have a few 4th of July decorations. The bright colors make me happy :)

(almost all supplies are from the Wood Connection)

Linking to:


Join  us Saturdays at tatertotsandjello.com for the weekend wrap up   party!


Monday, June 21, 2010

Summer

With today being the official First Day of Summer, I thought it fitting that I finally get around to finishing up our list of things we want to do before school starts again. This has been weeks in the making. I had Kaitlyn help me start writing the list at least 2 weeks ago (those are her fingers pictured above). Then I saw this cute Summer To Do list over at Eighteen25 and knew I wanted to cutesy mine up a bit. Today I finally had the opportunity and motivation to put it all together - an entire month into summer vacation. :)

I've also decided that we need a little bit more direction, more structure in these long summer days. It so easy for time to get away from me and half the day is gone before I bother to make sure the kids get dressed (and forget about the sunscreen - eek!). Or half-way through the day we've done everything we could possibly think of and have no idea what to do with ourselves. So I came up with a plan, of sorts. This too was a long time coming, it has been on my mind since at least a couple weeks before school ended. But as with many things, it took a while to put it in motion, partially because I was wondering how much structure I would really want with my days.
Here's my plan, or rather, my list (my name is Alayna, and I am a list-a-holic;) ). I still kept it kinda vague, in order to allow for lots of freedom and flexibility. It is summer after all.
Every day I want to:
-get everyone dressed and ready for the day (including sunscreen!) by 9AM. If we are having a lazy day and I let them turn on the TV when they woke up, this is when it goes off.
-chore time is 9AM. Hopefully I will have started on my To Dos for the day by that point. Either way, this is when the kids need to make beds, clean up any toys they aren't currently playing with, do their "special chore" for the day, etc
-make sure the kids do a learning activity of some sort every day. Could be a craft, worksheets, etc. Also includes daily reading practice for Kaitlyn. (I printed off a stack of worksheets today and had them do a few this afternoon. Kaitlyn has labelled it "home school" time - which she enjoys.)
-make sure we spend some time outside (weather permitting - it's been really crazy)
-final clean up time is 7:30 PM. All toys need to be put away inside and outside. Bathtime. Then some down time with a cartoon before bed.
Every week I want to:
-take a trip to the library
-Book of the Week - select a book and use it as a mini theme for the week. I don't want this to be a huge thing, but I would like to do one craft, one physical activity/game, and one learning activity that goes along with each one. I'll lay out some of my plans for you later this week.
-picnic at the park (I think this is going to be scheduled every other week with the neighborhood)
-plan a fun family outing (from the To Do List :) )

So what's on YOUR Summer To Do List?

Thursday, June 17, 2010

Car Seat Tents


My new favorite baby gift are these cute car seat tents. I've been seeing them on all kinds of blogs lately and think I would have loved one when my little ones were tiny. And since we needed 3 (yes THREE!) gifts for this week's baby shower/card night, my friend, Dari and I whipped up our own version.


I had originally been trying to decide between these and those great nursing covers. But thought maybe just the nursing cover wasn't such a good idea - too personal, assumed that they were going to breast feed, etc. So my solution was to combine the two ideas. We made these little straps with the clips on the ends (found the clips at JoAnne's, near the buttons) that can go around your neck and hold the blanket up when you nurse. And since the blanket is already attached to the car seat, there's very little chance you'll end up out in public with nothing to cover up with. Genious, no?! ;) I love them!


And here they are all ready to go!

*Update: I didn't want to include a tutorial because there are so many great ones out there for the tents already. However since some of you wanted details I will give you a few.
-I bought 2 yards of fabric for each tent, then cut 4" off the edge. I used the 4" for the straps (one fabric for the straps on the handle, one fabric for the neck strap) and sewed the larger pieces together for the tent itself (pillow style - sew around most of 4 edges, turn it inside out then topstitch around all the edges) so the finished tent is roughly 32" x 43"
-yes, I did use velcro on the straps over the handle. The buttons are just for looks :)
-placement of the straps over the handle: I drew an imaginary line about 4" to one side of the center of the tent (because the part that goes over the feet needs to be a bit longer than the part that covers the head), then placed the straps about 6" (sorry I can't remember exactly, it's been a few weeks since I made these) apart in the center of that imaginary line.

Linking to:


SYS Thurs

Sunday, June 6, 2010

Guest Blogging over at My Insanity

About a month ago I did a guest post over at My Insanity. I thought it was time to repost it here.

...Now on to the baby stuff! In my house we're just getting past the baby stage (in fact, we just gave our crib away and got my 3 year old a "big boy bed") but I have a TON of new babies and pregnant friends in my life right now. So I've got babies on the brain right along with everyone else (though I have to say I'm liking not having to experience the nausea and sleepless nights along with them). So today I thought I'd focus on cutesy-ing up the nursery. I have a few decor ideas for you, along with a quick How To. (sorry the photos are a little dark. It's a rainy week and I didn't want Kendra to have to wait for me to find some decent sunlight)

One of the things I love most about what was once my nursery is the bead board wainscot and the little shelf above it that runs around 2 entire walls in the room. This is the one thing I really wanted when I was pregnant with my first - enough to talk my brother-in-law into installing it and my mom into painting the room since my husband was deployed at the time. The shelf was mostly intended to be decorative but it also came in handy to hold the lotion and diaper cream above the changing table, or to put small things out of reach when I found them in a tiny baby hand. Since we moved my daughter out and my son in, I haven't done much with the shelf so today is the day I change that.
I have all these fabric scraps left over from making the quilt for the bed and decided I would try modge podging them onto something. I love photos and never have enough ways to display them so I came up with the idea of making a pseudo bulletin board out of a blank canvas I've had sitting around (it's been there since the painting class I took in college - 10 years ago! I'm such a craft pack rat). I say "pseudo" because I don't think it would be a good idea to be making pin holes in the canvas.Supplies:
-canvas (mine was 16x20)
-fabric strips
-modge podge
-embellishments of any kind

I kept the canvas white because I liked the contrast, but you can, of course, paint it first if you don't want the white. Then I put down a layer of modge podge where I wanted the first strip to go and smoothed the fabric over it.

Repeat with the other strips and let dry completely. *I'm told this step is crucial with modge podge in order to avoid bubbles.

Oh! And put your supplies up high if you walk away while it's drying. I went to make my son's bed (so it would be photo ready haha) and came back to find he'd been "helping!" Luckily it was just modge podge and no real harm was done. Just a word to the wise there... :)

When it's all dry apply another layer - or two or three - of modge podge over the top of everything to seal it down. I folded then ends of the fabric strips around to the back of the canvas and stapled them down onto the frame. I figured that would keep them on better in case the modge podge didn't quite hold (modge podge and I have a love-hate relationship. I have never quite mastered it and thus don't trust it!) or if the kids got their hands on it. Plus, I ran out of modge podge :) Then I added a little rickrack embellishment and a couple photos (using double stick tape and glue dots).

See? Easy! And inexpensive. And quick. My 3 favorite things.

And here are some other ideas I thought I'd share from my kids' rooms.
We all love the vinyl lettering right? A friend of mine sells it and gave me this quote when my daughter was born. I knew I wanted to be able to move it around so I put it on a frame and backed it all with scrapbook paper.

I found these shadow boxes at the local craft store - a set of four for $5! They were unfinished so I painted them. Then I altered a wooden letter for each of the kids. This one is my son's.

For my daughter's room I added more scrapbook paper to the back. And when she came home with this cute hand print from Kindergarten (Christmas present for us) I decided the shadow box would be a good place to showcase it. Wouldn't this idea be so cute with baby feet?

Well I hope you've picked up an idea or two from me today. If you use them, I'd love to see photos.
Thank you, Kendra, for letting me take over the blog for a bit. Can't wait to see the new baby and the baby's room! ;)