Menu buttons


Saturday, December 6, 2008

Dump Truck Birthday Party

***This post has been moved and reposted on my new blog.  Check it out HERE!***


Monday, December 1, 2008

Magic Elves

Meet Tinsel and Twinkle. They are the little elves that Santa sends to our house in December to keep an eye on the kids for him to make sure they are being good. (I love this little trick of Christmas - makes my life so much more pleasant when I have something extra to keep Katy in line) But we need to keep an eye on the elves too because each night they find something new to keep them busy, and sometimes get into mischief! This will be our second year hosting the elves and Kaitlyn is very excited to see where she finds them each day.

They showed up on our doorstep this morning with their passports, a letter of introduction/instruction from Santa, and their report forms that will be given to Santa on when he pickes them up on Christmas Eve. Kaitlyn's response, "Well, then we'd better be good!"


I have to admit that this year I wasn't totally prepared for the elves yet. The first of Dec just kind of crept up on me and Sam actually reminded me last night that they were showing up today. So I was secretly getting the letter written and updating the pastports while Katy was watching a cartoon before bed last night. Then the seldom experienced but very gratifying moment when I showed everything to Sam and HE WAS IMPRESSED! :) He even told me that our kids are lucky to have such a creative mom! Sorry - just had to share because a lot of the time guys just don't "get it" and I was impressed with him for expressing those sentiments.

Here is my Elf Schedule
1-on doorstep w/
-letter of introduction
-passport
-report
2-crumbs all over, hiding in laundry room by mini vac (Didja know elves live off crackers and water??)
3-in stocking w/ coloring pgs*
4-in kids’ closets
5-in living room with Ty’s bday presents
6-making breakfast (on counter, in cupboards)
7-under K’s bed
8-watching a movie w/ popcorn, blankets, new DVD?*
9-in hall w/ paper snowflakes*
10- left note on computer
11-in car
12-making cookies - dough in fridge, one in cupboard
13-TBD
14-TBD
15- in kitchen/living room w/ craft project*
16-in bathtub (clothing trail?)
17- in freezer with ice cream
18-reading books in Ty’s room w/ new book*
19-tree
20- in Katy’s room having a cotton ball snowball fight
21- outside - can see them from windows
22-my room
23- living room/kitchen w/ thank you card made out letters from newspaper
24-Katy’s room? Outside? Under the tree?
**have ready and waiting by the cookies and egg nog for Santa to pick up


I can't remember where I first saw this idea but for those of you that are interested, I did get a lot of inspiration from http://www.organizedchristmas.com/. They even have the reports, etc that you can print out. Just look for their Magic Elves section.

Update (12/13): I am adding a bit more information due to lots and lots of emails asking for more! I am happy to give you even more if this doesn't get you off to a good start. Feel free to keep emailing. And if you do implement this be sure to let me know!

Here are a couple of links that will give you ideas on how to "explain" the elves showing up. http://magicalholidayhome.com/elves/?page_id=33
And though I can't find it right now, I think the letter I put with the elves last year (to start the tradition) must have looked something like this http://magicalholidayhome.com/elves/?page_id=32 Be sure to look all around this site - it has tons of cute ideas!
Someone has also started up a Magic Elf profile on MySpace LOL.

I have also found that there are some "package deals" that you can get a set of elves along with a book about their story. Just do a search on the internet for Elf on the Shelf or The Night Before Thanksgiving (I think this is the better of the two).

And I meant to tell you - I had the devil of a time finding stuffed elves in the stores last year. (this was long before I stumbled across the package stuff, but I think the elves I found are cuter) So you may just want to skip the search and go directly to Amazon.com to buy your elves :)

Thursday, November 6, 2008

Dump Truck Birthday Party Invitation

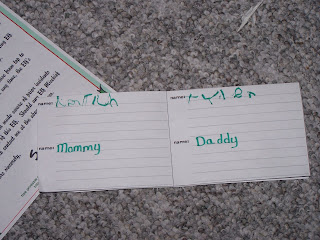
If I had to list Tyler's favorite things, a dump truck would top the list. In fact, it was one of the first words he learned to say. I think he's drawn to them because his grandpa has one, and he is a BIG fan of grandpa! :) So anyway - I picked dump trucks as the theme for Tyler's upcoming birthday. I struggled with ideas for the invitations for a few days but this is what I finally came up with. The whole things is paper pieced (yep I did the pattern myself!) and the back "dumps" to reveal the party info below it The wheels are on Pop Dots for a bit of added dimension. The front reads: "Tyler is 2! Dump everything and truck on over for a party!" And along with the party info inside I made sure to say it was being held "at the Caldwell Construction site."
I did some surfing last night and have pretty much completed the planning for the party. I have to say, there are TONS of cute ideas for construction parties out there and I just may have to do this theme again when he's old enough to participate in some of the activities. But for now I'm keeping it simple - and will tell you all about it after his birthday when I will of course have some cute photos to include.

Wednesday, October 15, 2008

Aurora Birthday Party

Kaitlyn's request for her party this year (5 years old!) was "an Aurora party with a horse pinata." So that's what I gave her.


Invitations - posted previously (link)

Decorations:
-Exterior decorations included a "pink carpet" (plastic tablecloths cut in half lengthwise and taped to the driveway), a tulle arch, and a picture of Aurora on the door (scene setter from Oriental Trading)
-topiaries - these were supposed to be outside too but the wind was too strong so they were put in the entry
-flying fairies - made with a Cricut and hung from the ceiling with fishing wire)
-castle - this was my scaled down version of Sleeping Beauty's castle, made out cardboard boxes. It was intended to be just part of the decor but when we brought it in we decided to cut the door out and let the kids play in it.
-another scene setter inside
-tablescape - white sheet (I really need to invest in some white tablecloths!) covered with a pink plastic tablecloth and gathered at the corners with big pink bows. Floral centerpieces - pink of course. Goblets that I found at Walmart then decorated with rhinestones. Simple pink paper plates topped with the napkin and fork that had been tied together with silver curling ribbon. And silver star confetti sprinkled around everything

The food:


-Aurora cake - used for decoration at the kid party to be eaten later with the grandparents. I used the Wilton doll cake pan and made her skirt and everything else out of fondant.
-cupcakes - ok these I am not happy with mostly because I had intended to do these really cute faux cupcakes (circles cute out of sheet cake, smooth pink icing, white polka dots) but when it came right down to it I wasn't talented enough to make them look good. So I ended up cutting the sheet cake into squares, frosting the squares and topping them with toothpicks that I decorated with stickers and circles of scrapbook paper.
-pink lemonade (another compromise on this one because I was going to do the Sprite and raspberry sherbet party punch but it was a busy day and I didn't get home in time to make it)
-I also offered them grapes but no one wanted them. At a party it's all about the cake right?!

The party:
-The guests were asked to wear they "royal attire." As you can see in the very first photo, Katy's friend Tyler didn't want to dress up as a prince or knight and instead came as the Lion King :) When each child arrived they were given a crown. (I found some really cute ones on Oriental Trading but they were too girly for the boys so I made the ones for the boys out of poster board - painted silver and added a few rhinestones.) Then they sat down to color some Sleeping Beauty themed pictures until everyone arrived.
-Kiss the Frog game - didn't want to do the typical frog/princess thing but did want to include the kisses and this game just sounded so cute. How it's played - choose one child to be the princess, blindfold her and give her Hershey Kiss. The rest of the guests choose little pieces of paper, one of which has a picture of a frog on it. When you say go, the person with the frog says "ribbit" and everyone else makes different animal sounds. The princess has to then follow the sound of the frog and give him/her the "kiss." It was then the frog's turn to be the princess until everyone had a turn. Sounds fun right? The older kids, the ones that were more outgoing got it and had a blast. But the younger ones or the ones that were to shy to ribbit...well, let's just say I caution you to keep in mind what children will be playing this in order to get the best response. Everyone still had fun with this but I felt like I was directing them too much throughout the whole game.
-Making Hydro-bracelets - instructions below
-Balloon Sword fights - instructions for making the swords can be found here For those of you that haven't tried to blow up those long balloons - you really do need a balloon pump. You should have seen us trying to do it by hand! But in a pinch (as we were) you can use a bicycle pump if you have the correct attachment.
-eat cupcakes then open presents
-pinata - was filled with candy, jewelry, and bouncy balls. The kids each took one turn with the blindfold but didn't seem to make a dent in the pinata so we let them hit it without the blindfold - over and over. I think they could have kept taking turns all day they were having so much fun. It was a very stubborn pinata. So finally the adults stepped in for a turn. And when that didn't work I cut it open and dumped the prizes on the floor :)

-then they got to play in the castle until the parents arrived, which wasn't long. The party went very smoothly and the activities perfectly filled the allotted hour and a half - and everyone seemed to have a fantastic time.
-other ideas I wanted to use: asking someone to dress up as Aurora and surprise their guests. I would have had her take photos with all the guests (printed and framed them during the party to send home as part of the favor or send afterward as a thank you) and either read the kids her story or help out with the party in some way. But buying the costume was out of the budget and I didn't have the energy to track down a rental.
I also found a cute game idea called cross the moat. You mark off 2lines about 20' apart.
Pick one player to be the "dragon" of the "moat," and have this player stand in the middle of the play area. The other players are "princes" and "princesses," and they should stand behind one of the lines marking the play area.To start the game, the dragon yells, "Try and cross!" All of the princes and princesses must then try to run across the moat, past the opposite line without being tagged by the dragon.Any prince or princess the dragon tags must become part of the dragon's tail by joining hands with the dragon or any other players in the dragon's tail. All players that have become part of the tail must run with the dragon to catch the remaining players. The last player to be caught is the winner and can be the next dragon. Obviously this is an outdoor game and it was too cold to play it at the party.


Favors:
-I made these favor bags for each child and attached a tag with their names. They were able to use the bag to collect their pinata prizes. The children also got to take their crowns, hydro-bracelets and their swords home with them.

Hydro-Bracelets
-you need 1/4" clear plastic tubing, 3/8" clear plastic tubing (I found this at Home Depot in the plumbing section), some sort of strong glue (I used Loctite Stik'n Seal because it was clear and waterproof. Found it at WalMart in the hardware section.), and very tiny things to go inside (glitter, microbeads).
-cut the 1/4" tubing to the size you want the bracelet to be
-cut the 3/8" tubing in 1" lengths - this is the connector
-glue one side of the 1/4" tubing halfway into the 3/8" connector and let dry. I also added a piece of tape to the other end (over a circle of paper I punched with a hole punch so the tape wouldn't end up sticking to the glitter inside and be easy to remove after ward) so that when the kids add the beads/glitter they don't fall out. (Older children could just hold the end with their thumb).
-at the party, each child was given a piece of the prepared tubing and added glitter and beads themselves.
-you then fill the tubing with water (leave a little bit for an air bubble), take off the tape holding the end closed and glue the end into the connector. Let glue dry during the party and don't forget to send the bracelet home with the kids.

Monday, September 15, 2008

Aurora Party Invites

This is the prototype for the invitations for Kaitlyn's party. I have been playing around with acetate today and came up with it. I think it works. Now only a dozen or so more to go!

Friday, August 29, 2008

Dora Birthday Party


For Kaitlyn's 4th Birthday we decided on a Dora theme. I was particularly excited about this one because although it was a lot of work, it was also fun to come up with all the challenges for the kids on their adventure - just like in the TV show!

We started out in the living room (of my mom's house -mine was too small and I couldn't count on the weather cooperating), where we discovered that Swiper had swiped the birthday cake. Of course we had to go to his hideout to get it back. And what do we need to help us find it? The map! I had made backpacks for all the kids (you can find instructions at NickJr.com), complete with their own maps. The map told us to follow the Star Path (star shapes cut out of cardstock and taped to the floor) across the Puzzle Bridge, through the Lollipop Forest to Swiper's Hideout. So the kids looked around for the stars and sure enough there they were leading us into the kitchen.

In the kitchen was the Puzzle Bridge (blue sheet spread on the floor for the lake, bridge made out of posterboard with various shaped pieces cut out of it) that needed to be put together before they could cross. How do we do that? Ask Backpack if he has anything that will help us. And yes, each child had a puzzle piece that fit into one of the holes on the bridge.

Once across the bridge we ran into Swiper (my niece), who we scared off by shouting "Swiper, no swiping!"

The star path led us to the stairs, where we encountered the Singing Door. The poor Singing Door (with my niece doing the voice from behind it) couldn't get the words right to some popular kid's songs.

As soon as the kids helped her sing them correctly they were allowed through and made their way downstairs to the Lollipop Forest (large lollipops constructed with posterboard and dowels which had been shoved into flower pots so they would stand up). We were about to make our way through the Forest when I received a call from Diego saying that some of the animals from the Animal Rescue Center were lost in the Lollipop Forest. Well, since we were there, of course we helped Diego look for them and sent them all back to the Animal Rescue Center (these were stuffed animals of course). We also caught a glimpse of Swiper through the window - he was carrying off the presents! "Swiper, NO SWIPING!"

We consulted the map again and found we were almost to our destination. Sure enough, we could see Swiper's Hideout just past the Dark Tunnel (card tables covered with brown sheet). We needed something to help us get through the tunnel and happily found mini flashlights in their backpacks. Once through the tunnel we were confronted by the door to the Hideout, which was locked up tight. The kids had to search through a big box of keys for the Star Key that opened the lock on the door.

Once through the door we found...Kaitlyn's Fiesta! Swiper hadn't been stealing the cake and presents, he was just helping set up for the party :)

We then ate and did the present thing. The food included cupcakes, strawberries (one of Katy's fav things), Dora shaped animal cracker type things, and star shaped Goldfish, and of course Katy's green punch. The cake was saved until the next day for our extended family party. (that's my tradition - cupcakes for the kids, the fancy cake for the grandparents) Then the kids had to go back and do the whole adventure again because they loved it so much.


The only thing I was sad about was that I didn't have the sound effects to go along with everything - the songs, Swiper's voice saying "oh man!" and so on. Oh well. As people keep telling me, it was an over-the-top party even without that :)

Oh, can't forget the party favors. I gave them little bags filled with some Dora fruit snacks and some things I had printed out from NickJr.com (paper dolls, coloring pgs, etc). And of course they each got to keep their backpacks, maps, and flashlights.

Thursday, August 28, 2008

Fairy Birthday Party

For Kaitlyn's 3rd birthday I chose to do a fairy birthday party.

The Decorations:
-bubble machine outside on the porch which was decorated with ballons, tissue flowers, and streamers
-giant butterflies and tissue paper flowers hanging from the ceiling, giant tissue flowers in pots
-fairy tent (white christmas lights and tulle, hanging from the ceiling)
The Party:
-when the girls arrived they were each outfitted with fairy wings, flower crowns (silk flower leis that I had pulled apart and threaded the flowers onto pipe cleaners that I had formed into circles, and added curly ribbon streamers), and fairy dust (body glitter) on their cheeks
-Find the Fairy game - printed out clipart of fairies on small pieces of paper and hid them around the room
-Kaitlyn's favorite freeze dance game (I really need to come up with a name for this one, but names really aren't my specialty): printed and colored pictures of a fairy, unicorn, flower, etc (with at least 1 of each item per guest), cut the paper into circles, and laminated the circles. To play you just toss out the circles on the floor and designate on item for everyone to stand on. Turn on the music and the kids dance around the room (you can tell them to skip, hop, crawl, etc too). When you turn off the music you call out a picture for them to find, stand on, and "make a shape" (pose). This one was a real hit - Kaitlyn had a meltdown when we tried to move on to the next game so we ended up playing this again after eating.
-fairy picnic: I find tiny tea sets that I served the food on. The food itself was mini cupcakes and fruit fairy wands (melon cut into tiny star shapes with a cookie cutter, on toothpicks) and green punch (specific request from Katy since that was her absolute favorite color at the time)
-make your own beaded bracelets/necklaces

The Favors:
-I "planted" silk roses into small pots (that I had painted and stenciled with butterflies) and hid the favors inside each rose and inside the pot. The favors included butterfly hair clips, bracelets, and small vials of body glitter (fairy dust), bubbles, flower shaped sidewalk chalk
Oh! I almost forgot one of the best parts - the invites! I need to find one of them and post a photo because they turned out really cute. I made teeny tiny invites - probably about 1 1/2" square in a tiny font. Then I put them into larger envelopes along with fairy dust and little magnifying glasses.


How To - Tissue paper flowers
-Stack 5-6 sheets of tissue paper together (can be full sheets or smaller pieces as long as all pieces are the same size) and accordian fold, lengthwise.
-Find center of folded tissue and tie together with pipe cleaner.
-Gently separate each layer of tissue paper from the rest, shaping the flower as you go. Better instructions can be found in many places in the internet if you can't understand my description (I know, photos would help)

How To - Wings (this is the quick, easy, cheap version - there are other methods)
-cut tulle into rectangles, roughly 15" x 24" or so (depends on size of children)
-take 2-3 tulle pieces and scrunch together in the center. Either wrap with wire or thread to hold together in center.
-cut 1/4-1/2" elastic into approx 36" length and sew ends together to form a circle. Size will depend on child - you want the loop to fit comfortably around both arms and connect to the wings in back. Attach elastic to center of wings, forming 2 loops for the arm holes.
-wrap center of wings with ribbon to cover up the area where you connected everything together and sew it all together.

Wednesday, August 27, 2008

Birthday Parties

In case I haven't mentioned it yet, I love throwing elaborate birthday parties for my kids. And in preparation of the next round of parties (Oct and Dec) I am going to recap some that I have put together so far. Hopefully, this will get me even more excited to get going with the rest of the preparations for Kaitlyn's 5th Birthday - which is a little more than 6 weeks away. For those of my friends that think I'm nuts to put this much effort into it, you will be happy to know that I have trimmed my party plans down quite a bit from what I had originally envisioned. :)

Sunday, July 20, 2008

Red, White, and Blue

We wanted to get our old friends and their families together so we decided to throw a BBQ. And because it was Alisha, Cheri, and I hosting, of course we went all out.
Cheri found the recipe for this drink last year (from Family Fun?) and has been dieing to try it. Looks really impressive right? We thought so :) It's not too hard to make.
Recipe:
-fill glass 1/3 full with ice cubes and pour in cranberry juice (we found that less than a 1/3 full with the juice worked best)
-add more ice cubes (up to 2/3 line) and pour in blue Gatorade
-add more ice cubes and pour in DIET Sprite
Easy! The whole premise is that the differences in sugar content keep them layered like that. So theoretically you could do this with any number of drinks as long as the one with the largest sugar content is on the bottom and the least sugar is on the top. The only problem with these is that they don't taste all that great. As you are drinking it you taste each one individually and while that may be ok it just doesn't taste like a party drink. Ah well - guess we will keep experimenting with other, better tasting ones and see what we can come up with.
I just have to do my "heights" on the tables. It my favorite table-scaping trick. Just put a few boxes under the tablecloth and you're done.
These are our party favors. We filled them with enough graham crackers, marshmallows, and chocolate for each family to make their own smores at home. (We didn't dare do a campfire with that many kids running around)
The table decorations were pretty easy. Pretty scrapbook paper inside cylindrical vases. A chunk of floral foam inside holds the flags. Simple, elegant - yay! I was thinking afterward that we could have added bows but didn't get around to doing it before the party.