Menu buttons


Showing posts with label furniture re-do. Show all posts

Thursday, March 20, 2014

Wingback Chair Redo

I did it!  I did it!  I finally tackled my first reupholstery project and woohoo!  Success!
 I picked up this lovely chair last year (yes a whole year ago, urgh) on a shopping trip with a friend at a Habitat for Humanity Resale Store.  We completely filled the back of the SUV on that trip ahaha - more on that part later. 
This chair in particular cost a whopping $5.  Yup.  FIVE DOLLARS!  I figured at that price even if I messed it up I wouldn't feel too bad.  And it obviously needed a little TLC.
Then I started pricing upholstery fabric - yikes!  I mean, it wasn't exactly a surprise because back when I was doing design it wasn't unusual to order $125/yard fabrics for custom chairs.  But that doesn't work for my budget.  I eventually found a small discount fabric place not far from my home, but after a couple trips at different times I still hadn't found anything I loved and most were still upwards of $12/yd.  Luckily I stumbled onto a link to fabrics.com and found some great deals.  The fabric arrived a little over a week ago and it was finally time to tackle the chair.
I did a quick review of a tutorial I had found on a blog, then grabbed the pliers and dove in.

 My trusty sidekick helpfully had her nose in on the fun most of the time.

Do you know how many thousands of staples they put in one chair?  Me either but it's a LOT.  I gave my hand a break every hour or so of work in the hope that I wouldn't get blisters (I didn't!).  And eventually I had it all torn apart.
Then I happily took a trip to the craft store to get more batting, upholstery tacks, and cording to sew the piping.  And it wasn't that long (parts of two days' work) before I had it all finished!  The husband was actually pretty impressed.  He didn't think I would actually finish the project, let alone end up with a decent-looking chair.  He should know better than to doubt me, right? ;)  (He didn't admit any of this until after the chair was all put together and he had sufficiently praised my efforts lol.  So I forgave him.)
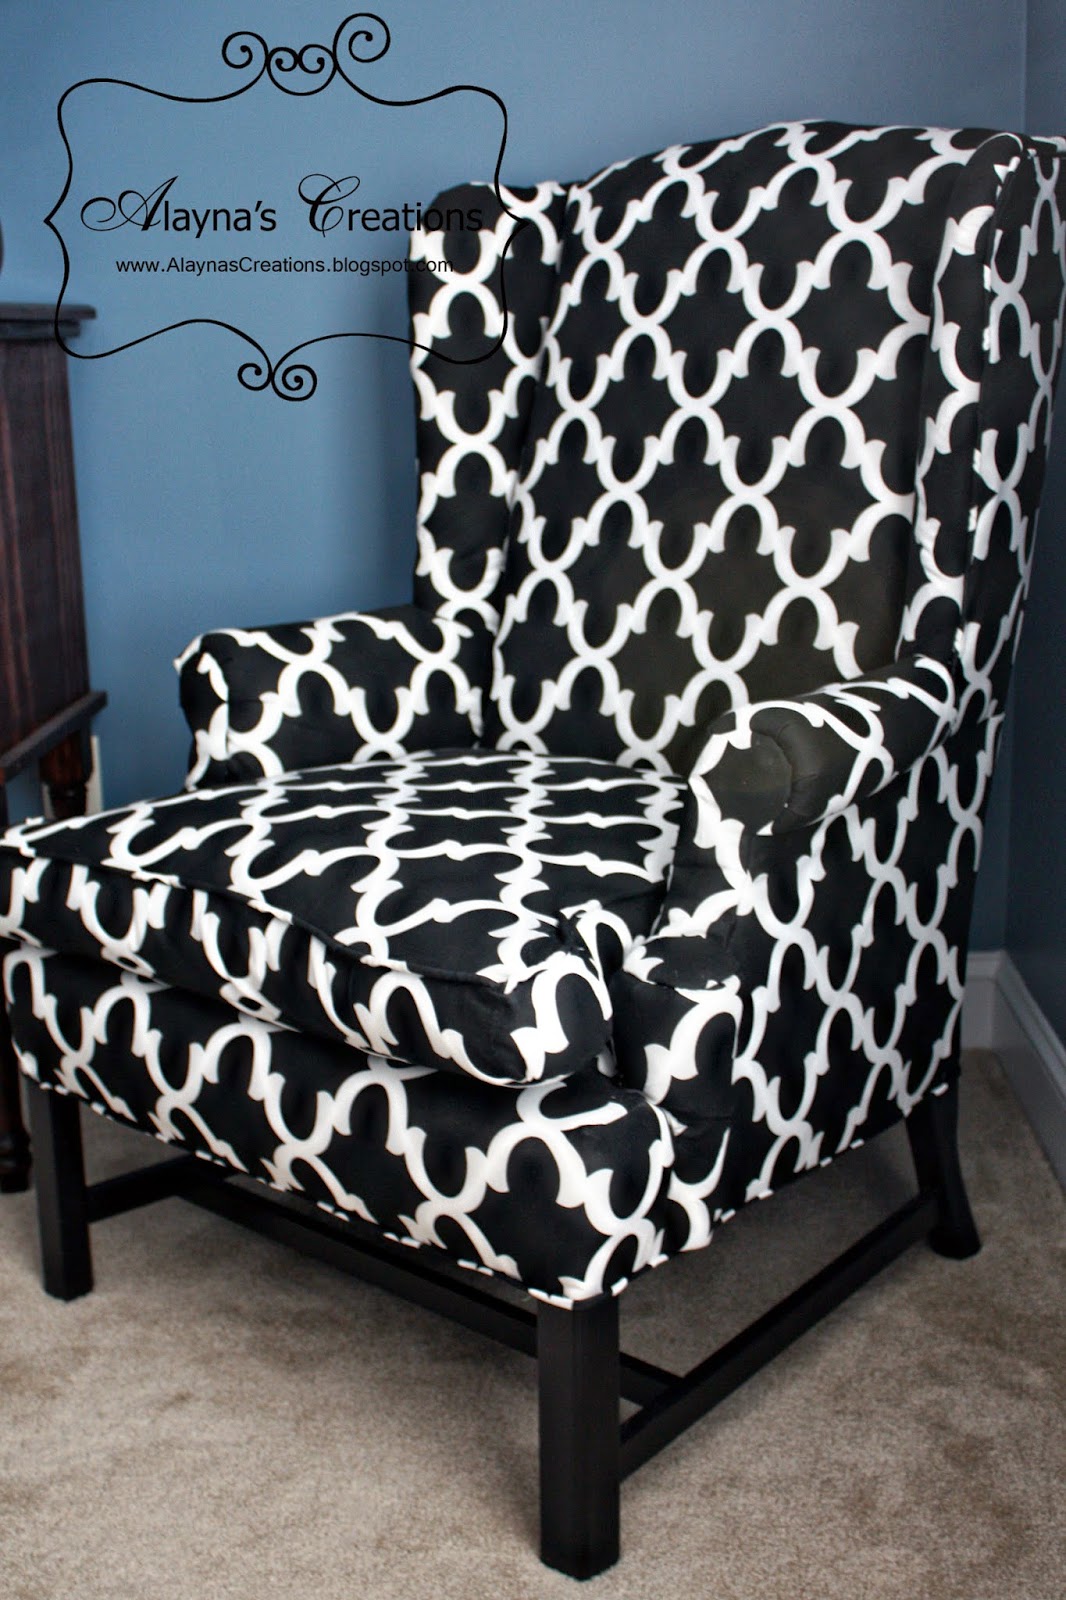
 Look!  It even looks good close up! ;)  And yes, I painted the base black before putting the fabric on.  I almost forgot to do that part LOL.  Some of my other tips? 
-Take lots and lots of photos as you pull the old fabric off.  It really helps to be able to go back and see the process in reverse, or look at a few details on how to attach the tricky pieces.
-Carefully label (number it when removed, where it went, and which side is the top!) and set aside each piece of old fabric as you remove it.  Not only will you be able to use them as patterns to cut out the new fabric, but you can also refer back to them when you are assembling the chair.
-Take your time!   This is a labor-intensive process and it takes its toll on your hands and your patience.  When my hands were cramping up or I found myself annoyed or ready to rush through a step I would stop for a few hours or the rest of the day.  The last thing I wanted was to "mess it up" and then have to see my blunder every time I looked at the chair.  So take your time and do it right (or fix it right then) as you go.
 The chair now happily resides in our bedroom.  I'm this close to having the bedroom completely pulled together.  I'll share that soon.
But for now, I'm going to enjoy the chair.

Monday, December 3, 2012

Furniture Upgrades

Welcome to December!  We've had so much going on and I have SO much to blog about!  I'm hoping to spend a little time in the next few weeks playing catch up, because you know I love to share the projects I've been working on.  Like the furniture I refinished a few weeks ago - weeks!  Aaaaa I'm so behind.  *sigh*
My husband, like most men always wants the biggest and best when it comes to technology, particularly TVs.  So I finally let him upgrade the TV in our bedroom for Father's Day  (Yes have a TV in the bedroom, which I know some say is a No No.  But if that's what it takes to shut my brain off so I can get to sleep at night, I'm all for it.  Plus it's nice to have an extra TV when the husband is watching something I really don't want to see) and eventually I got around to buying the wall mounting bracket for it.  Which happily led to me getting to play Musical Chairs with the furniture as I was then able to move the dresser than we had been using for a TV stand into the playroom.

The dresser matches the nightstand and headboard that are in the guest bedroom (that's through the doorway to the right in the photo above) and is now being used to hold the TV and electronics in the playroom.  I moved all the video games and DVDs into the drawers on the dresser which freed up not only the nightstand that was originally holding the TV, but the small bookcase next to it.  And I knew exactly where I wanted to use both pieces.
The nightstand was a high school shop project that my husband did, so we've had it pretty much forever.  It needed a little work as part of the trim on the bottom was coming off and the doors weren't exactly square - I repeat High School Shop ;)  But my husband is now a much better carpenter and those were easy fixes.  I added a few coats of white paint and now it's good as new!

Pretty!  The nightstand now lives in Tyler's room where he quickly loaded it up with all his stuff.  I actually had to take half it of back off and stow it in the closet before I took these photos :)

And then there is the nightstand.  I think we got it for about $20 for my first room at college to give me some extra storage.  It's dated, but in good shape so out came the spray paint.
 

And then into Kaitlyn's room it went.  She's been trying to find a good spot for her "library" so this was perfect.  She spent a lot of time categorizing her books and she even went as far as to put little code stickers inside each cover so she knows where to put her books away after she uses them.  LOL  This kid is going to be quite the powerhouse when she's all grown up.
So wouldn't you know it right in the middle of all this furniture switcheroo-ing the TV in the living room died.  And now we are left with a completely blank wall where the TV in the bedroom used to be with a sad pile of electronics in the corner including the dead TV that we have no idea what to do with.  Cross one thing off add another to the List, right?

Monday, November 14, 2011

My Craft Room

I've heard horror stories about moving damages, so guess we were pretty lucky. The biggest thing to get broken was this dresser. They completely snapped all the back legs off.

We weren't too upset. It was an inexpensive dresser that we purchased for Kaitlyn's room more than 8 years ago (ack! still can't believe my baby is EIGHT). With the new built-ins in the closets, we didn't need it in Kaitlyn's room anymore. But with a little TLC, I knew it would be useful SOMEWHERE. So the dresser has been sitting in my craft room, mostly unused, since it wasn't totally stable without the back legs.

10 months after the move, we finally got around to refinishing it! It was part of our big project day right before my birthday (last month) and I've been excited to show it to you. But let me show you what else we worked on that day before I show you the reveal.

They were replacing all the tables in Sam's classroom at the base and were giving away all the old tables. These things had been beat up, what with being used to clean guns on, etc. And they were pretty utilitarian looking to begin with. But really - free tables? Can't pass that one up. And they had to be an improvement over the teeny tiny table I had been using in the craft room.


Metal base, wood top -pretty basic. We forgot to get a Before photo, but here is the first table after Sam got done sanding down the top. As it turns out, when we were restaining the tops we ran out of stain after the first one. The new stain on the second table didn't quite match the stain on the first. So Sam brought home a 3rd table top and sanded that one down too. We did remember to get a photo of that one.


Here is a close up - ick, right?!


Alright, enough with the Befores. Are you ready for the big reveal?

Tada! Here is the dresser after a coat of black spray paint and some new handles.


Sam cut off the rest of the legs and replaced them all with a solid base so now the dresser looks more like a piece of cabinetry.


The black looks really pretty against the red and white on the walls and the wood on the floor. (I have to say though - you have to dust black furniture WAY more often than any other kind!)


There! Now my printer and my Silhouette have a nice new home!

And those tables? Well they look pretty good too!

As it turns out, once they were sanded down the wooden tops had an almost butcher block type look. After a nice dark coat of stain and some spray poly (first time using the spray - love the smooth finish from the spray. I don't think we'll go back to the kind you have to apply with a brush) the wood looks gorgeous! And of course we hit the bases with a coat of black spray paint too.
Total cost: under $50 for paint, stain, poly, and new handles. $50 for all three pieces!


I think I can get a lot of crafting done in this space, don't you?

Thursday, June 2, 2011

Monster Truck Bed

I've decided to join the ranks of all those crafty people that comb through thrift stores, buy something for dirt cheap and turn it into something fabulous. If they can do it, we can do it right? And with all the blank spots still left in this house, that's probably the only way they will get filled.

My first big find was this headboard for Tyler. Only $25 for it and the matching footboard!
Tyler and I painted them white (not as smoothly as I had hoped since my little helper really did stick right by me the whole time, much as I tried to sneak out to the garage myself to do the final coats alone) and covered it with a few coats of poly. I had also promised him a "monster truck bed" so I found a truck font online and used it to cut a monster truck out of black vinyl with the Silhouette.

Ta-da! We realized that the mattress frame doesn't have a place to connect the footboard. So we'll have to buy some wood and make side rails at some point. But we're happy with it as is. Tyler was so excited to sleep in it that first night.


Kaitlyn thought it was pretty cool too and of course wanted something added to her own bed. She even took the time to draw up her idea before asking me if I would make it. (though I found that Ty had ripped it apart when I went to take a pic - anyone else notice a super-destructive phase in their 4 year old boys??)
So Tyler and I snuck in there and decorated her bed for her this morning. I love to surprise that girl! We'll see how long it takes her to notice it when she gets home from school.


Linking to:


Thrifty Decor Chick