Menu buttons


Showing posts with label black and white. Show all posts

Thursday, March 20, 2014

Wingback Chair Redo

I did it!  I did it!  I finally tackled my first reupholstery project and woohoo!  Success!
 I picked up this lovely chair last year (yes a whole year ago, urgh) on a shopping trip with a friend at a Habitat for Humanity Resale Store.  We completely filled the back of the SUV on that trip ahaha - more on that part later. 
This chair in particular cost a whopping $5.  Yup.  FIVE DOLLARS!  I figured at that price even if I messed it up I wouldn't feel too bad.  And it obviously needed a little TLC.
Then I started pricing upholstery fabric - yikes!  I mean, it wasn't exactly a surprise because back when I was doing design it wasn't unusual to order $125/yard fabrics for custom chairs.  But that doesn't work for my budget.  I eventually found a small discount fabric place not far from my home, but after a couple trips at different times I still hadn't found anything I loved and most were still upwards of $12/yd.  Luckily I stumbled onto a link to fabrics.com and found some great deals.  The fabric arrived a little over a week ago and it was finally time to tackle the chair.
I did a quick review of a tutorial I had found on a blog, then grabbed the pliers and dove in.

 My trusty sidekick helpfully had her nose in on the fun most of the time.

Do you know how many thousands of staples they put in one chair?  Me either but it's a LOT.  I gave my hand a break every hour or so of work in the hope that I wouldn't get blisters (I didn't!).  And eventually I had it all torn apart.
Then I happily took a trip to the craft store to get more batting, upholstery tacks, and cording to sew the piping.  And it wasn't that long (parts of two days' work) before I had it all finished!  The husband was actually pretty impressed.  He didn't think I would actually finish the project, let alone end up with a decent-looking chair.  He should know better than to doubt me, right? ;)  (He didn't admit any of this until after the chair was all put together and he had sufficiently praised my efforts lol.  So I forgave him.)
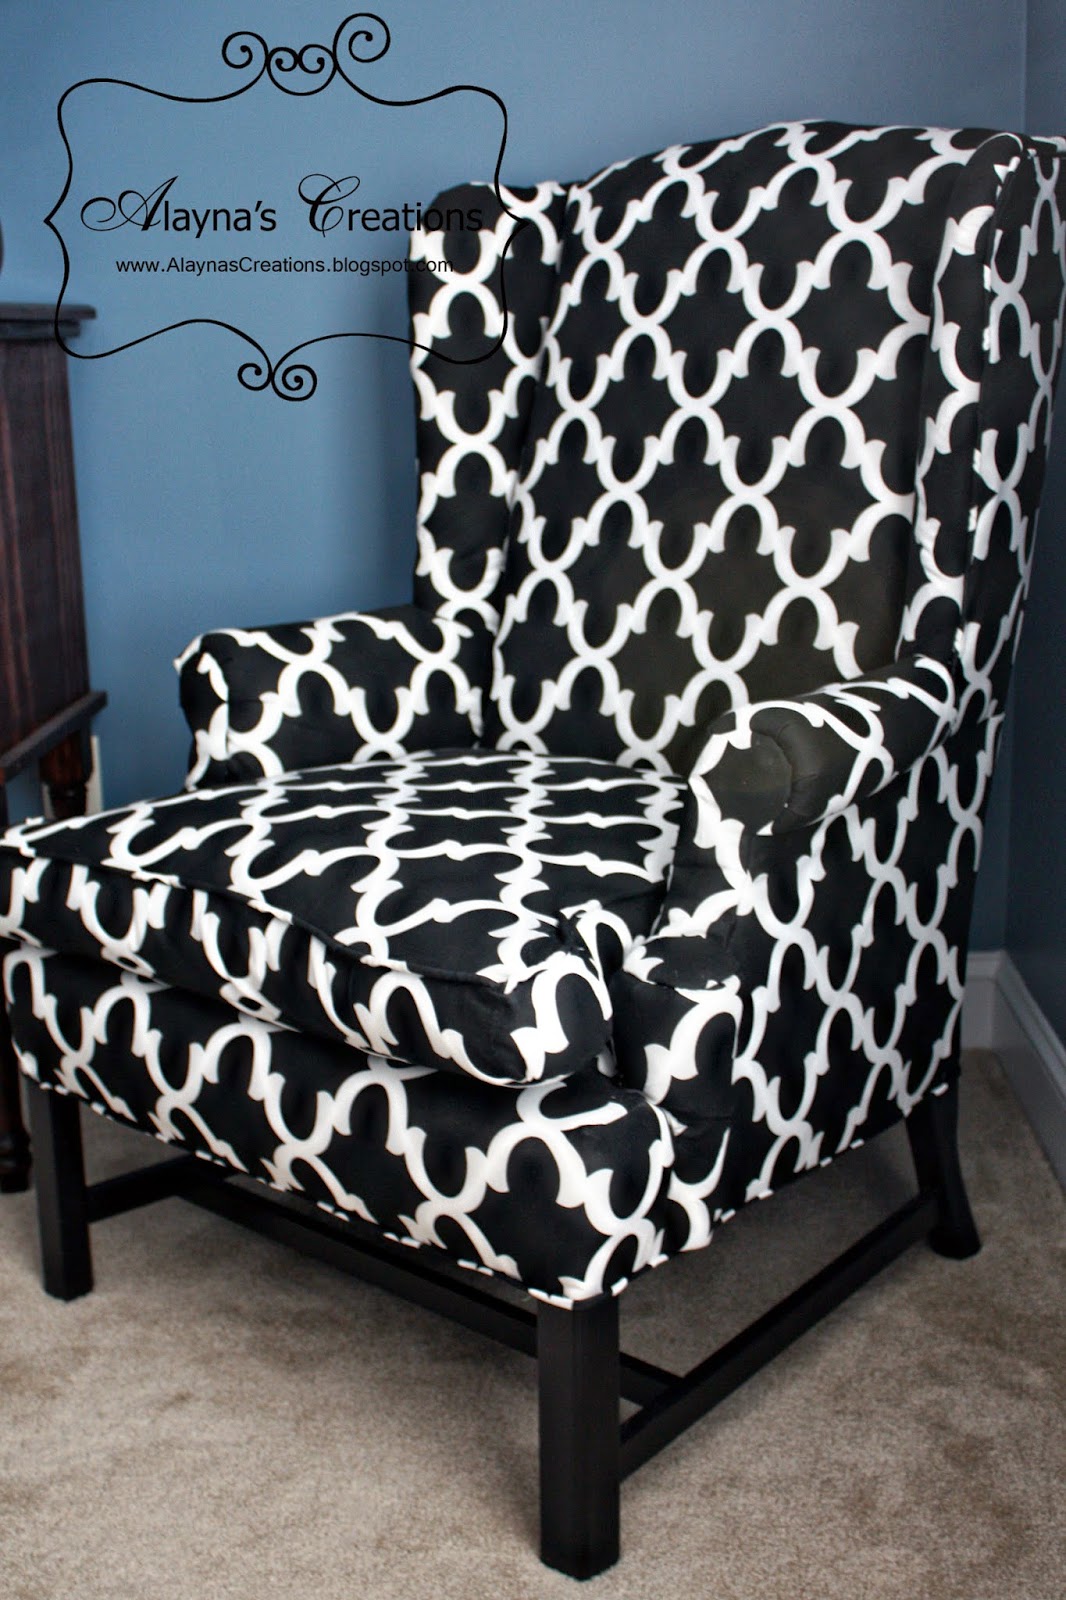
 Look!  It even looks good close up! ;)  And yes, I painted the base black before putting the fabric on.  I almost forgot to do that part LOL.  Some of my other tips? 
-Take lots and lots of photos as you pull the old fabric off.  It really helps to be able to go back and see the process in reverse, or look at a few details on how to attach the tricky pieces.
-Carefully label (number it when removed, where it went, and which side is the top!) and set aside each piece of old fabric as you remove it.  Not only will you be able to use them as patterns to cut out the new fabric, but you can also refer back to them when you are assembling the chair.
-Take your time!   This is a labor-intensive process and it takes its toll on your hands and your patience.  When my hands were cramping up or I found myself annoyed or ready to rush through a step I would stop for a few hours or the rest of the day.  The last thing I wanted was to "mess it up" and then have to see my blunder every time I looked at the chair.  So take your time and do it right (or fix it right then) as you go.
 The chair now happily resides in our bedroom.  I'm this close to having the bedroom completely pulled together.  I'll share that soon.
But for now, I'm going to enjoy the chair.

Saturday, March 8, 2014

Up on the Wall

 Remember this?  Well, I got it up on the wall!  (See Dari?! It didn't take 6 months! lol)
Where?  In the master bedroom, of course.  On that big blank wall by the bathroom.
 
I found I already had some photos printed, so I was able to make a nice little grouping on the wall.
PS - the hangers on the back of those frames drove my husband nuts when hanging them.  Not only are they each not quite placed in the same spot in the back, but the little hooks flip up and down so it was a real pain trying to get them on the wall.  We ended up with our faces pressed against the wall and a flashlight trying to see behind it to make sure we caught the hooks right.  I think it took us as long to hang these as it did to do the entire monogram photo wall in Tyler's room.
I'm starting to get excited about this room coming together.  I can count on one hand the number of projects I still want to do in the room - yay!  Next up is reupholstering a chair.  The fabric I ordered for it arrived the day before yesterday.  EEEEK!

Monday, January 25, 2010

Checkered Flag Birthday

My husband turned 30 last week and you can't hit a milestone like that without a party right? So of course we pulled a big group of family and friends together for it. I have to admit I was doing my best to keep this one streamlined. I'm a bit partied out at this point (and have to admit that is shows in the photos too, sorry. I was more interested in playing hostess than taking photos). So I enlisted a bunch of help with the food and kept the theme really simple.
Sam is really into NASCAR, and since I had some black and white stuff left over from the last big party I decided to go with a checkered flag theme. A package of flags and a plastic checkered tablecloth is all it took to pull everything together. And I have to say, Sam walked into the party room and was impressed, so that's all that matters. And he said he had a great time - yay!

The decor:
-white tablecloths with a small piece of the checkered tablecloth (I cut it into six 18" squares for the tables, one large square for the buffet table, and used the leftover strip on the cake table). Then I alternated centerpieces. Some were black and white balloons tied onto a wooden block and others were altered paint cans with flags stuck in them.

The food:
-I wanted to go with a tailgate theme so we had hot wings, pigs-in-a-blanket (biggest hit of the party, I need to do these more often), chips, veggies, pasta salad, chinese chicken salad, and a nice selection of drinks. I set the drinks up on their own table, with the beer (that my hubby snuck in) in a big metal bucket. The cake (Boston Cream Pie) got it's own table, along with the other goodies.

The entertainment:
-well it's a grown up party so everyone is pretty happy just sitting around visiting. The only planed entertainment was singing happy birthday and having Sam blow out the candles. But I did grab a big race track game from the party store to keep the kids occupied.

Tuesday, December 15, 2009

Black and White Birthday


A good friend of mine just turned 30. She has 4 kids and her birthday just happens to be sandwiched in between 2 of the kids' birthdays. And thus - no big birthday bash for herself on her agenda. So we offered to do one for her!

We went with a black, white and red color scheme - it's a favorite for both of us - and just took it from there. It doesn't take much to throw a good party for adults - a few cute touches and good food and they pretty much entertain themselves.

The invitation:

Decor:
-Happy 30th Birthday banner. I know we've seen these all over the place in blogland so of course I had to try one myself. Loved it! If I could get away with using it again for the next party I'm doing, I would. (my husband turns 30 in January. He'd like the black and white floral damask and polka dots right??)
For mine I used my largest circle cutter for the background, my scalloped circle Nestabilities for the mat, and just printed out the lettering from the computer and cut that into circles and layered them all together. Punched holes in each side of the circles and tied them together with ribbon and tulle.
-We wanted to do photo holders for centerpieces. And can you believe I couldn't find what I wanted ANYWHERE? But I did have all these leftover wooden cubes so we painted them up, added some patterned paper and had the hubby drill a few holes in the top. Then we took some wire (Home Depot, hooks and photo hanging section, thickest kind they had) and twisted it up into the shape we wanted. Then just used a little hot glue to hold the wire in the cube. We had her mom and sister send a bunch of photos that we stuck in the ends of the wire. We placed these in the center of each table, as well as on the gift and cake tables.
-Black and white polka dot fabric. Cut it down into 2' squares for the center of each table and larger sections for the food tables.


Food:
-a nice variety of soups. She's vegan so we went with meatless chili, minestrone, and chicken noodle (yeah not vegan, but most of the husbands would have protested the complete lack of meat)
-rolls
-caramel apple cider (yum!)
-yummy chocolate cake from Costco
We had a TV and movies, along with coloring stuff to keep the kids occupied. Didn't work very well. That's my one complaint about big parties for adults - you just can't keep the kids from running (literally) around unsupervised. Drives me nuts. Short of hiring a sitter to keep track of them all or having someone run activites for them I don't know how to avoid it. Anyone have a better solution to this problem?

But all in all, a nice party for someone who certainly deserves it. Happy Birthday Cheri! Thanks for making the drive up here for it :) And a big thanks to Alisha and Beau Dee, my co-conspirators.

Now back to our regularly scheduled holiday programming, for at least another week or so.